Having attended to the malfunctioning speaker and the broken supply and take-up arm belts, more little problems started to make themselves apparent on the EIKI NT projector.
The Auto-Loading Guide That Was Not Retracting Properly
This projector has an auto-loading feature. When engaged, the mechanism arranges itself so that the film will self-feed from the supply sprocket, via the gate, sound drum and various rollers to emerge at the rear of the machine, ready for manual threading onto the take-up spool. The auto-load guide is positioned immediately after the supply sprocket and guides the film to form a correctly-sized loop and thence into the film gate guides.
Once you’ve auto-loaded the film, you don’t need these guides anymore — the projector would not work with them in place. Pulling on the film where it has emerged from the rear of the projector releases the auto-loading mechanism and the auto-load guide should then retract into the projector body. But this one wasn’t always doing that. Often it required a little push. Was it meant to be that way?
Removing the rear cover, I discovered that the lever mechanism which connects to the auto-loading guide near the top sprocket was very stiff. I applied some WD-40 on its pivot screw and exercised the lever vigorously until it became much looser. Now the auto-load guide mechanism retracts by itself as it should.
This episode was a sign that this machine probably had indeed been in storage for a long time. What further problems might await?
Warbling Sound and a Stuck Sound Drum Pressure Roller Pressure Roller
I decided to run some old, non-valuable film through the projector to test the repairs to the spool belts and the auto-load mechanism.
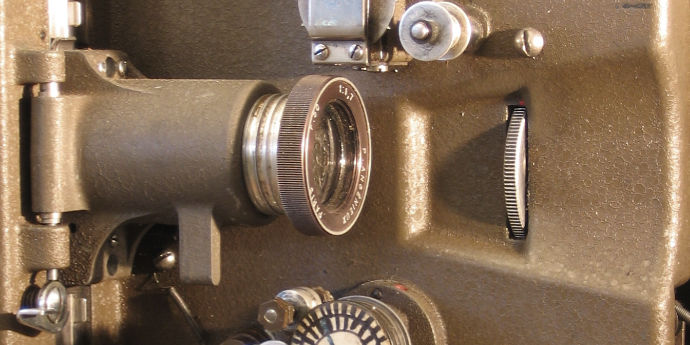
Things seemed fine except that the sound was not steady. Projectors have “loops” before and after the gate which decouple the jerky film pull-down movement from the smooth motion through the feed sprockets. The soundtrack on a 16mm film is offset from the picture by 26 frames. Over this distance the film motion needs to be stabilised and the jerky movement of film pull-down smoothed out to get optimal sound reproduction. The usual way of doing this is to have a “sound drum” around which the film passes and which is connected to a flywheel which stabilises the film motion. The soundtrack is optically detected as it passes over the sound drum.
In this projector it seemed the film motion was not being properly stabilised, resulting in very audible modulation of the audio signal. In fact, it appeared that the sound drum was not moving in sync with the film motion — in other words there was slippage between the sound drum and the film. If I manually spun the sound drum up to match film speed, the sound had less spurious modulation. What could be the cause? Inadequate friction between film and sound drum? Sound drum and flywheel bearings not adequately lubricated?
I emailed Frank Arnstein at Projector Heaven who offered this advice:
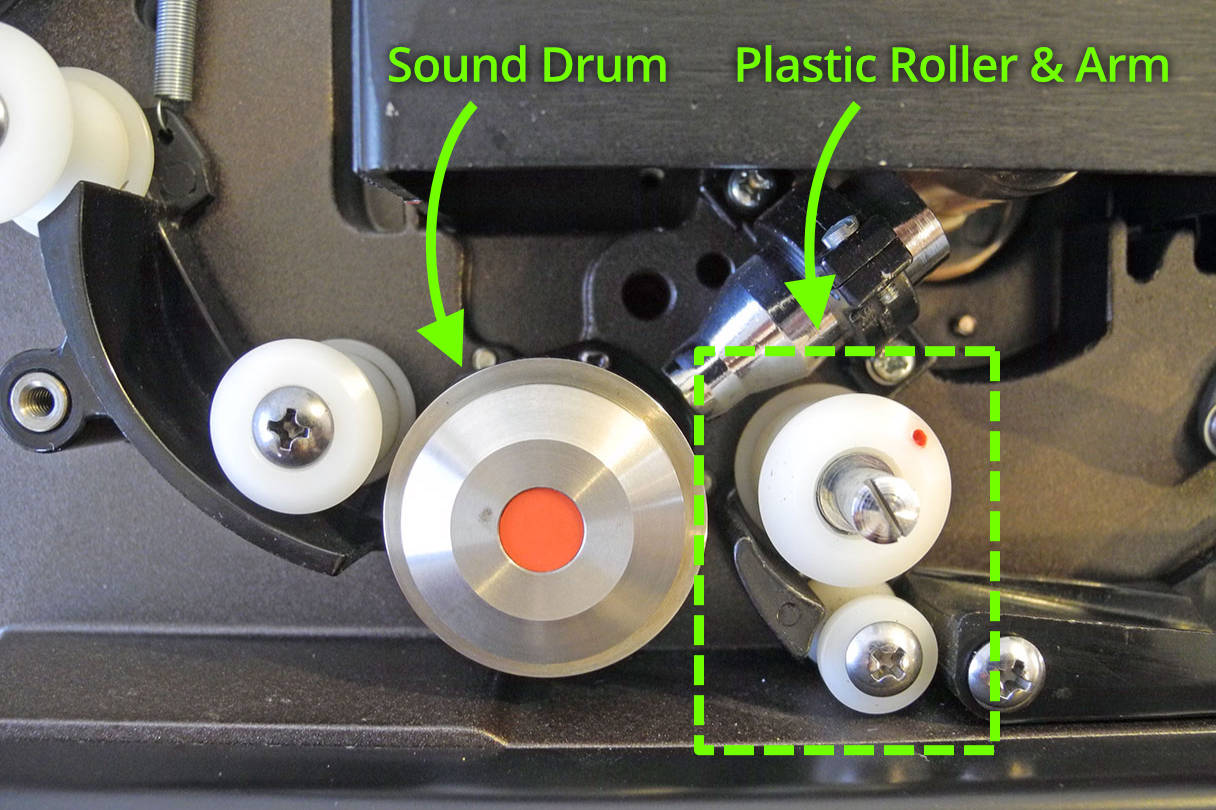
“This sounds like the film is not wrapping onto the sound drum tightly enough, causing it to slip and poor sound results.
“These projectors need to have the small spring loaded plastic roller and shaft lubed and free to press against the film at the sound drum.
“Access is often best from behind the cover to see the parts that need freeing up.
“I am not at all surprised by this occurring as it happens on many Eiki machines that need lubing and freeing up after long periods of inaction.”
On closer inspection this indeed was the problem. The plastic roller whose purpose it is to hold the film tightly against the sound drum, but which retracts during auto-loading, had stuck in the retracted position. The plastic roller could rotate freely enough, but the arm on which it is mounted was firmly stuck in the retracted position. It required very significant finger pressure to get it to move even slightly. Clearly the bearing had seized up.
Looking inside the rear of the projector, I discovered a spring-loaded arm and lever assembly which appears designed to pivot the sound drum roller back and forth as part of the film loading mechanism. However in this case the pivot motion was almost un-moveable.
Putting a little machine oil at each end of that axle and then pushing it back and forth (so stiff it moved only very slowly) made it slightly looser. But it seemed I would need to remove the axle from its bearing entirely to clean and lubricate it.
Doing that would require access to a screw which holds a bush onto the rear end of the axle, and getting access to that set screw was not possible without removing the amplifier and power transformer for screwdriver access. Hmmm. On thing was leading to another.
Frank Arnstein provided some more useful advice:
“I always remove the amp and power supply to get access to those parts behind that need freeing and lubing. It must be done to do this job properly.
“This lubing should start at the moveable lower loop former shaft and extend all the way up and along to the other end of a long chain of moving parts.
“Their correct operation will ensure the auto threading and sound quality is good. There may be manuals for this but I don’t know for sure or have one.”
Frank had confirmed that further disassembly would be required. So I set about removing power transformer and the amplifier.
When doing this kind of work it pays to keep the parts in labelled containers and to photograph each step in the disassembly process. It’s so easy to forget down the track how things go back together!
At last I was able to remove the sound drum roller and the shaft which was gummed up.
I then disassembled and washed in warm soapy water the elements of the sound drum pressure roller. I cleaned the formerly seized up shaft with “Jif” (a slightly abrasive cream cleanser) on a dry cloth and then washed it off. I then dried all the components so nothing would rust. After wiping any remaining grease stains off the various pieces, I reassembled them so they are ready to re-install in the projector chassis.
Is a More Complete Overhaul Needed?
At this stage I had a decision to make: to re-assemble the sound drum roller, the amplifier and transformer and leave it at that, or to attempt a more complete overhaul of the projector? Given what I had discovered so far, together with Frank’s comments about these machines needing lubrication after being in storage, and considering the evidence that the machine had been stored in slightly damp conditions, I decided on the latter. More on that in the next post.